ZWO Standard Electronic Automatic Focuser EAF Pro 5V with bluetooth
The new generation of ZWO EAF continues the
brand signature minimalist design, featuring a robust metal housing and
precise angular lines — a perfect fusion of form and function. Available in two versions:
EAF and EAF Pro - to suit different user needs.

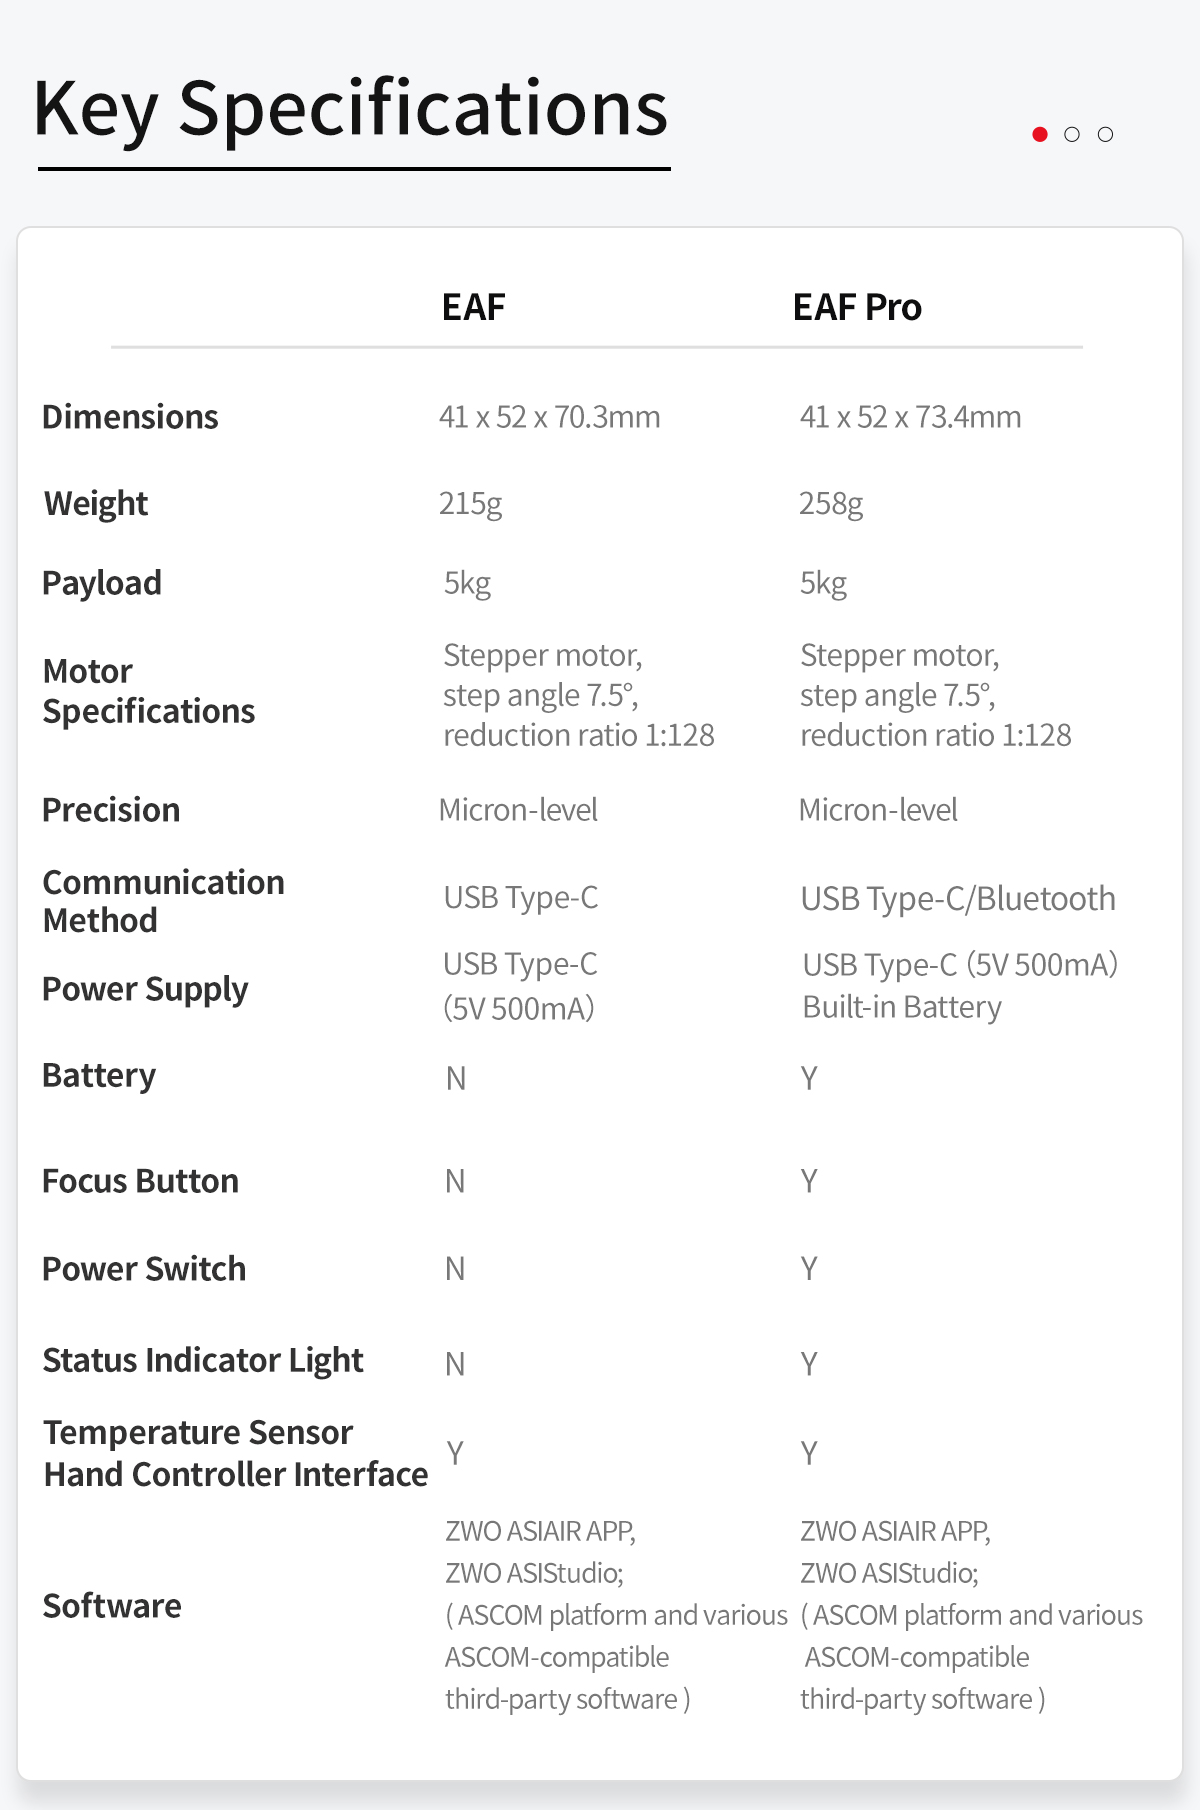
EAF features a more universal Type-C
interface for broad compatibility and easy installation.
EAF Pro comes with a built-in battery and
Bluetooth connectivity, reducing power supply constraints. It also includes
manual focus buttons, allowing direct adjustment even after installation - offering maximum
flexibility and convenience. Both models deliver a more user-friendly focusing
experience, achieving pinpoint focusing accuracy for breathtaking cosmic
imagery.


EAF Pro
Wireless Bluetooth Control
The EAF Pro features a built-in low-power
Bluetooth 5.0 chip, enabling wireless connectivity with ASIAIR and smart
cameras. It is fully compatible with ASIAIR APP, ASIStudio, and ASCOM platform
software - offering flexible and cable-free focus control.

EAF Pro
Built-in Lithium Battery
Powered by an integrated lithium battery,
the EAF Pro frees you from external power constraints and enables truly
wireless operation. It offers greater flexibility and ease of use to meet
diverse needs.


EAF Pro
Integrated Focusing Button
The EAF Pro features integrated focusing
buttons on its body, allowing users to make quick and precise adjustments even
after installation. This design greatly enhances usability and flexibility,
enabling seamless focusing across a variety of observing and imaging scenarios.

Extensive Software Support
EAF supports both ASCOM and INDI protocols,
making it compatible with a wide range of astrophotography software, including:
ZWO-developed platforms: ASIStudio and
ASIAIR APP
Third-party software: SharpCap,
FireCapture, Maxim DL, The SkyX, SGP, Nebulosity, and more
Also compatible with third-party focusing
software such as FocusMax

Installation Steps

1. Remove the coarse adjustment knob of the
telescope focuser using a suitable sized wrench.
2. Install the coupling on the telescope focuser shaft and
tighten the locking screw with the 2mm hex wrench.

3. Attach the focuser body to the coupling,
align the EAF motor shaft flat surface with the locking screw, and tighten the
locking screw using the provided 2mm hex wrench.
4. Secure the EAF body to the bracket and the
bracket to the matching mounting holes
in the focuser assembly using the supplied M4 screws. Ensure that the
bracket is flush with the EAF mounting surface without any gaps, and that it is
parallel to the focuser body surface.

5. Check and ensure that all the connections
of the EAF are secure. This completes the hardware installation of the EAF.

6. For curved focusers like the one in the
image above, you only need to use the original locking screws and 3 washers to
secure the EAF. There is a groove at the bottom of the EAF bracket, and a
single screw provides sufficient stability.

Mechanical Diagram of EAF Pro


What's in the Box


